In order to set up your Epson printer for the first time, please follow the steps below:
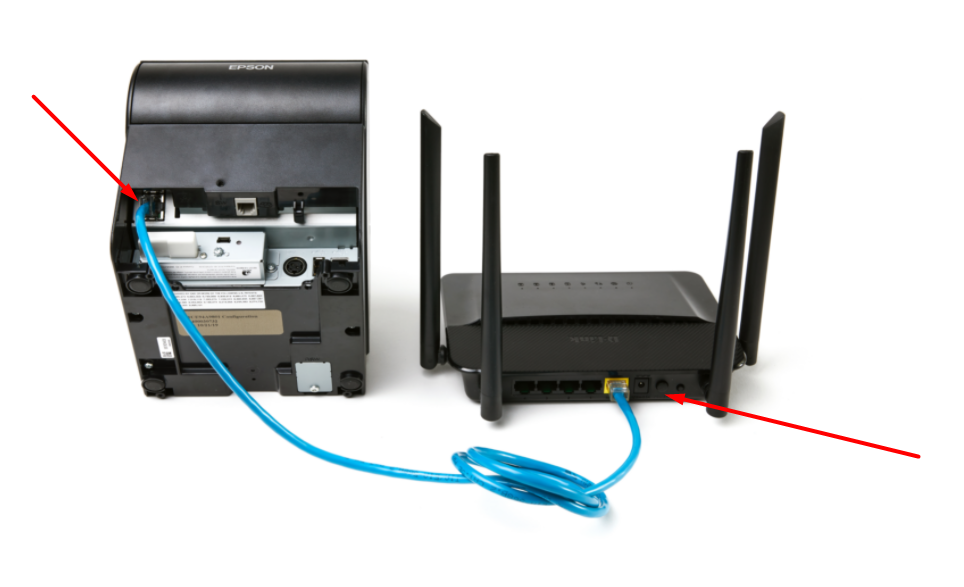
1. Make sure a LAN cable is plugged into the printer and router. It should look like this:
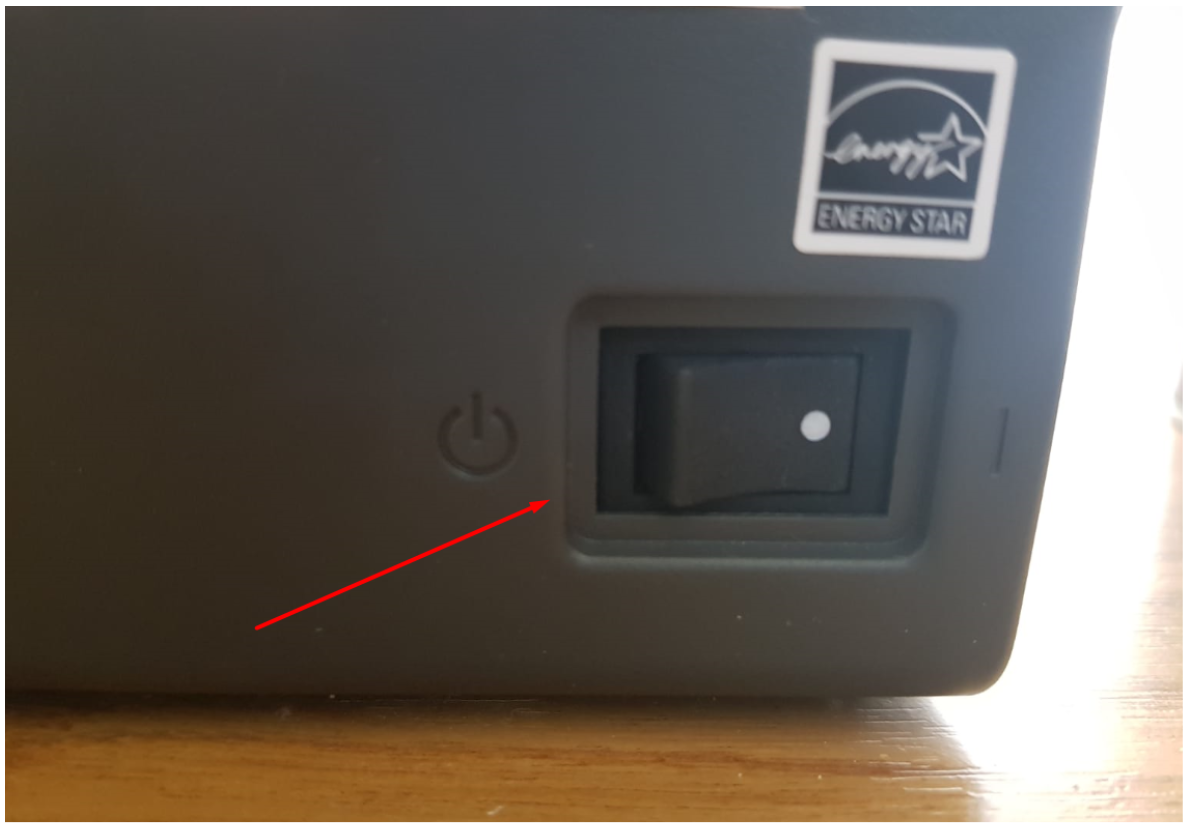
2. Power Off the printer.
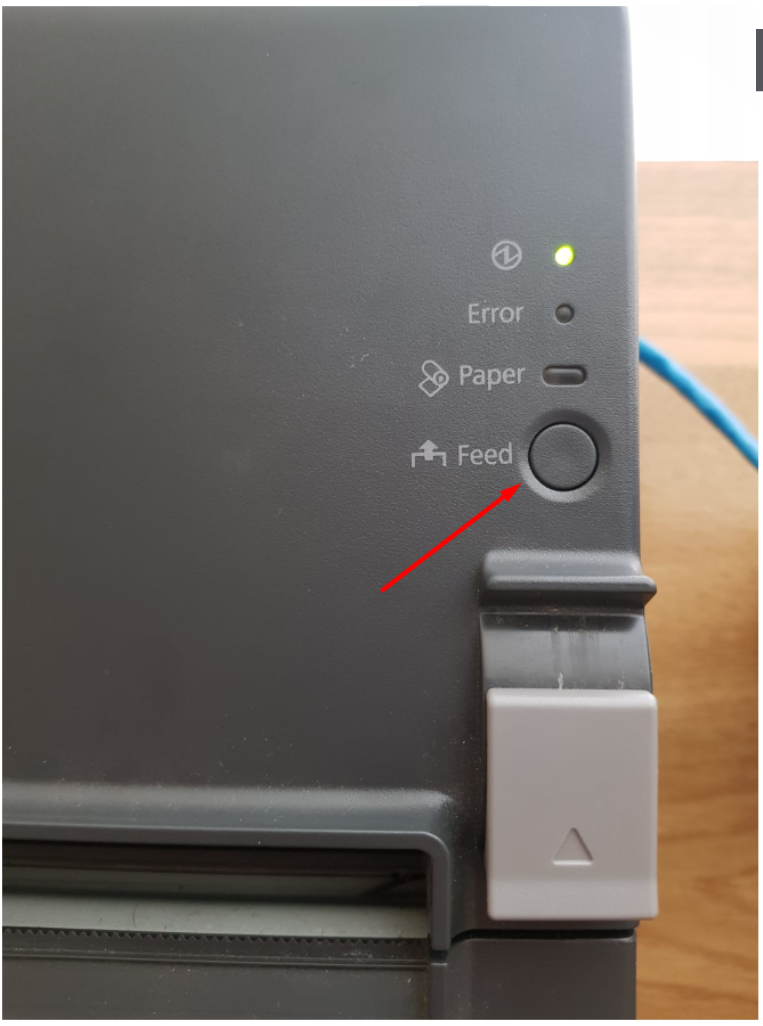
3. Press on the Feed button and keep it pressed for 10 seconds. Hold the Feed button pressed and power up the printer. In the end, you will hear a sound that marks the initialization of the printer’s configuration printing.
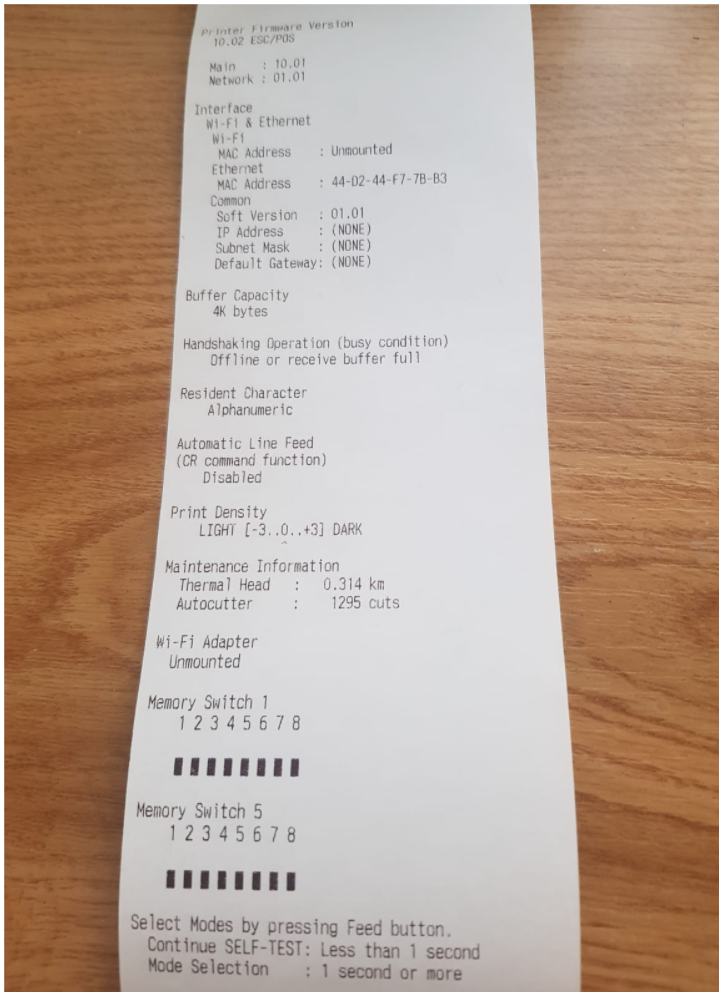
The printer’s configuration should look like this:
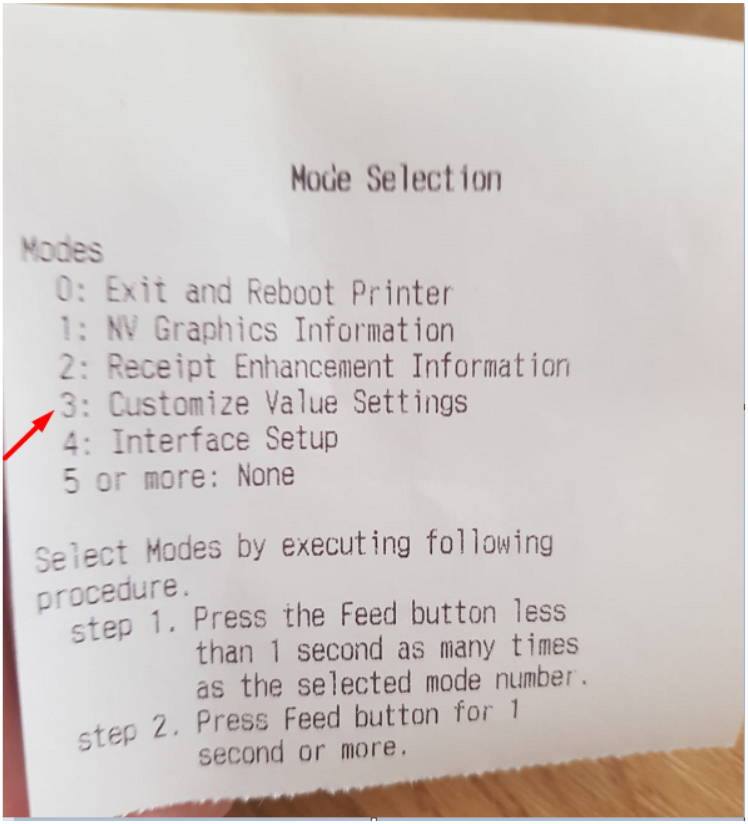
4. Press the Feed button 3 times and hold it pressed for 1-2 seconds more until the Mode Selection instructions appear. It should look like this:
5. Press the Feed button 3 more times and hold it pressed for 1 more second.
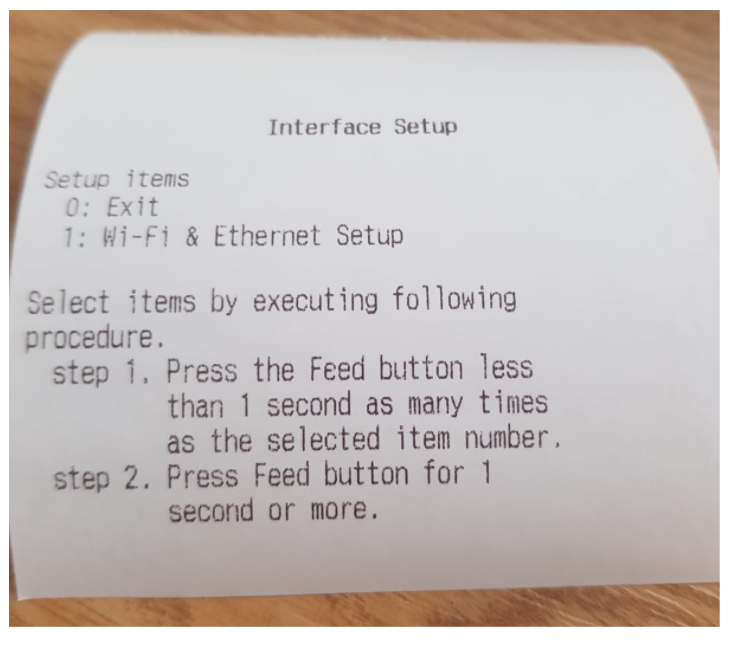
6. Interface Setup should emerge, which looks like this:
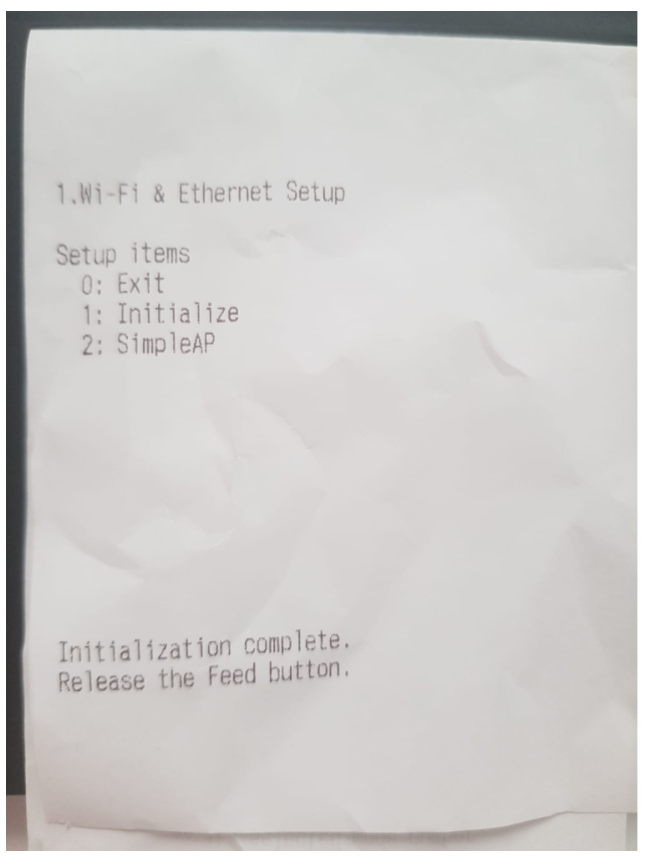
7. Here you press the Feed button 1 time and hold it pressed afterward for 1 more second. Wi-Fi and Internet setup should appear, which looks like this:
8. Press the Feed button 1 time and hold it pressed for 1 second until the confirmation message appears.
Here is a short video showing these steps.
The process should be similar for other Epson thermal printers (on LAN).
========
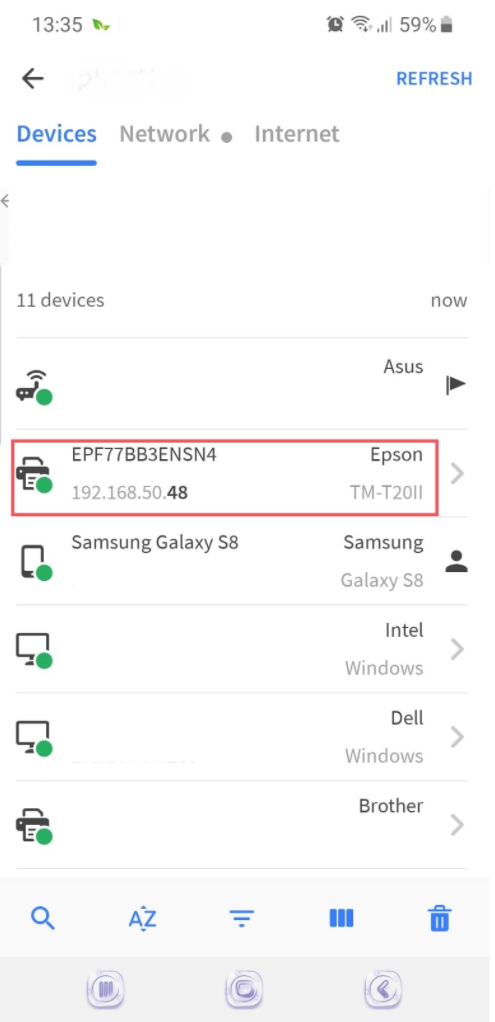
Use the Fing App to check if the printer was registered to your Local network:
Android: https://play.google.com/store/apps/details?id=com.overlook.android.fing&hl=en
iOS: https://itunes.apple.com/ro/app/fing-network-scanner/id430921107?mt=8
You should see your EPSON printer in the list in the app.
Here is an example for Android:
If the printer is found - use RestaurantApp to detect the printer on LAN.